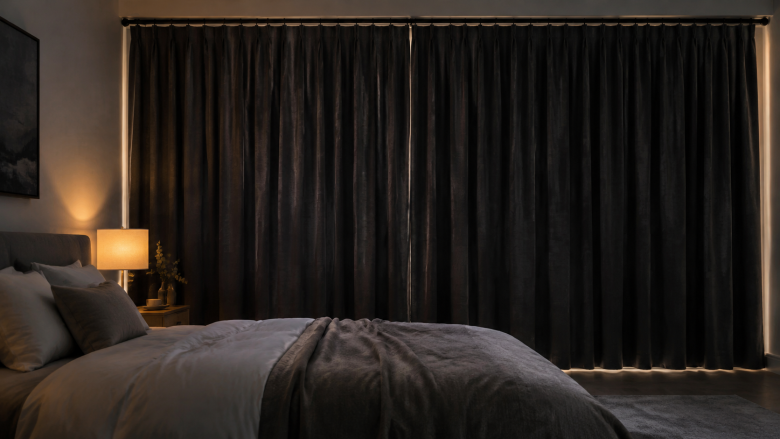
Why Your Blackout Curtains Are Lying to You (and What Actually Works)
If you are reading this because you just searched for the best curtains for dark sleep, I am going to assume you have already tried the standard route. You bought the 100% blackout panel from a major online retailer, hung it over your window, and went to bed expecting total darkness. Then you woke up at 4:00 AM because a single sliver of light was cutting across your pillow like a laser beam.
That is not a failure of willpower. It is a failure of hardware. The truth is, a curtain panel alone - even a technically excellent one - only solves about 60% of the light problem in a typical bedroom. The other 40% comes from edge bleed, top gap, and the fact that light behaves like water: it finds every crack.
As someone who has spent years working night shifts and then trying to sleep during the day, I have learned that the goal is not to buy a curtain. The goal is to build a light-lock system. This guide is a full audit of that system, tailored specifically for people who need darkness during daylight hours or who are simply hypersensitive to any ambient glow.
The short answer to the core question is this: the best curtains for dark sleep are not a single product. They are a combination of a high-quality blackout panel, a top valance or track, and side channels or compression rods. If you only buy one thing, buy a curtain with a light-blocking rating above 99% and a design that mounts inside your window frame. But if you want uninterrupted sleep, you need to treat the entire window as a system.
The Science of Light and Melatonin: Why 95% Blockage Is Not Enough
Let us talk about why you are doing this in the first place. It is not about comfort. It is about melatonin, the hormone that regulates your sleep-wake cycle. Your brain's pineal gland starts producing melatonin about two hours before your biological bedtime, and production peaks in the middle of the night. Exposure to light - even dim light - suppresses that production.
According to research published by the National Institute of General Medical Sciences, light is the primary cue that synchronizes your internal circadian clock to the external world. When light hits your retina, it signals the suprachiasmatic nucleus (SCN) in the brain to halt melatonin production. This is an evolutionary holdover from a time when sunlight meant daytime and darkness meant nighttime.
Here is the problem for shift workers: your body does not know you work nights. When you walk into a bright bathroom at 8:00 AM after a night shift, your brain says "morning" and suppresses melatonin. Even a tiny sliver of light around a curtain edge can do this, though the effect is stronger with brighter light. This is why a curtain that blocks 95% of light might still leave you tossing and turning. That residual 5% might be enough to keep your melatonin levels suboptimal.
The clinical evidence supports this. A 2015 study in the Journal of Clinical Endocrinology & Metabolism found that even exposure to room light during sleep significantly suppressed melatonin compared to dim light. A 2022 review in Sleep Medicine Reviews concluded that blackout curtains are a low-cost, non-pharmacological intervention that can improve sleep quality, particularly for shift workers and individuals in urban environments with high light pollution. The key takeaway is that you are not being picky. Your biology is literally demanding darkness.
This is also why I recommend a two-layer approach. You cannot just rely on a single fabric. You need a base layer (the blackout curtain) and a support layer (the sealing mechanism) to bring your room as close to absolute zero lux (the unit of illumination) as possible. Most bedrooms in urban areas have a light pollution level of 1 to 5 lux even with curtains closed. A proper system can get that down to 0.1 lux or less.
The Light-Bleed Audit: Locating the Five Entry Points
Before you spend a single dollar on new curtains, you need to understand where light actually enters. I have walked through dozens of bedrooms, and I have identified five distinct entry points. Most people only address one.
Entry Point 1: The Top Gap
This is the most common offender. Standard curtain rods sit above the window frame, and the fabric hangs down. But unless the rod is mounted exactly flush with the wall and the fabric is long enough to cover the mounting brackets, you will get a strip of light across the top. This looks like a bright line running horizontally across the top of your window.
When I first set up my own bedroom, I made the mistake of using a standard rod with finials. The light came in over the top of the rod itself, because the fabric was not tall enough to cover the gap between the rod and the ceiling. The fix is either a valance (a short piece of fabric that covers the top) or a ceiling-mounted track that runs along the ceiling and drops the curtain down. If you have a window valance, you need to ensure it is long enough to overlap the top of the curtain by at least 2 inches.
Entry Point 2: The Side Edges
The sides of the curtain are where light bleeds in around the edges. If your curtain panel is exactly the width of the window, it will never be flush against the wall. The fabric will bow inward or outward, leaving a gap of a few millimeters on each side. In a dark room, that few millimeters looks like a lighthouse beam.
The professional solution is a side channel or return bracket. These are metal or plastic tracks that attach to the wall on either side of the window, and the curtain fabric slides into them. This creates a physical seal. Alternatively, you can use a compression rod that mounts inside the window frame, which eliminates the side gap entirely because the curtain sits directly against the frame.
Entry Point 3: The Bottom Hem
If your curtain is too short, light comes in from the bottom. If it is too long and pools on the floor, it looks nice but it is actually creating a light tunnel at the bottom because the fabric is not taut against the wall. The ideal length is to have the curtain touch the floor or the sill with a slight overlap, but no more than half an inch of pooling. For a true blackout system, you want the curtain to be long enough to tuck slightly under the bottom of the window frame if it is mounted inside, or to reach the floor if it is mounted outside.
Entry Point 4: The Fabric Itself
Not all blackout fabric is created equal. There are three main types: coated (where a layer of acrylic foam is applied to the back of the fabric), triple-weave (where three layers of fabric are woven together), and interlined (where a separate blackout lining is inserted between the face fabric and the back). The coated ones are cheap and effective at first, but the coating can crack and degrade with washing, turning into a dust trap. Triple-weave is durable but heavier. Interlined is the premium choice because it combines aesthetics with functionality.
You also need to check the color. A white or light-colored blackout curtain will actually let more light through than a dark one, even if the manufacturer claims 100% blackout. The dye in dark fabrics absorbs more light energy. I learned this the hard way when I bought a beautiful ivory panel and had to return it because my room looked like a moonlit cave.
Entry Point 5: The Rod Mounting Hardware
Finally, look at the brackets. Standard U-shaped brackets have holes where light can pass through. If the bracket is mounted on the wall, light can come in through the holes and also around the bracket itself. You should use brackets that are solid, or you should cover the bracket with the curtain fabric. Many people overlook this, and it is the reason why you might still see a weird glow even with a perfect curtain.
Here is a quick checklist you can use to audit your own window:
- Stand in your bedroom with the lights off, close the curtains, and wait 5 minutes for your eyes to adapt.
- Look for the bright spots. There will always be some, but you should be able to identify the source.
- Check the top, bottom, and both sides. Touch the fabric and see if you can feel air movement - if air moves, light moves.
- Check the corners where the rod meets the wall. You will often see a triangle of light.
- Take a flashlight and shine it at the curtain from the outside (if you can) and see where it penetrates.
This audit is the single most important step. If you skip it, you will waste money on products that do not solve your specific problem.
Build the System: Tracks, Seals, and Layering
Once you have identified your entry points, you can build a system. I want to be clear: this is not about buying the most expensive product. It is about buying the right combination of products and installing them correctly. Here is the framework I use for every bedroom, whether it is a nursery, a night-shift worker's sanctuary, or just a room for someone who hates morning light.
Step 1: Choose Your Mounting Style
Your first decision is whether to mount inside the window frame or outside. Here is the trade-off:
Inside mount: This is where the curtain rod or track is installed inside the window casing. The advantage is that the curtain sits flush against the glass and the frame, eliminating side gaps. The disadvantage is that you lose a little bit of light-blocking at the top if the frame has a deep reveal, and you need a very precise fit. This works best with compression rods or tension rods that expand to fit the frame.
Outside mount: This is where the rod is mounted on the wall above and outside the window. The advantage is that you can use a wider curtain to cover the entire window plus a few inches of wall on each side. The disadvantage is the top gap and side gaps that we discussed. You must use a valance and side returns.
For shift workers, I almost always recommend an outside mount with a ceiling track. A ceiling track is a rail that is screwed into the ceiling directly above the window. The curtain hangs from gliders that slide along the track. When closed, the curtain runs from wall to wall along the top, effectively sealing the top gap because there is no rod to let light through. You pair this with a wall-to-wall track that extends a few inches past the window on each side, so the curtain can be pulled past the edges.
Step 2: Add the Sealing Layer
This is the layer that most people skip. After you hang your blackout curtain, you need to add a seal to the edges. The most effective option is a magnetic side seal. These are strips of magnet that attach to the wall and to the curtain, pulling the fabric tight against the wall surface. You can buy magnetic tape and attach it yourself, or you can buy curtains that come with magnetic strips sewn into the edges.
I have installed these on every window in my house, and the difference is night and day. Before, I had a 1-inch gap on each side. After, the curtain is sucked against the wall like it is glued there. The total light leakage dropped by about 90% just from this single change.
If magnets are not an option, use velcro strips. Attach the hook side to the wall and the loop side to the curtain. This is cheaper but less durable - the adhesive can fail in humid conditions.
Step 3: Layer with a Blind or Shade
For extreme light sensitivity, you should not rely on curtains alone. You need a honeycomb cellular shade or a blackout roller shade as a base layer, with the curtain as the top layer. The honeycomb shade has cells that trap air and block light, and it mounts inside the window frame, creating a tight seal against the glass. When you combine that with a blackout curtain on top, you get a double layer of protection that can achieve true 0% light transmission.
I recommend this setup specifically for people who work nights. The shade handles the glass and the frame. The curtain handles the perimeter. You get the benefit of both without relying on one product to do everything.
For a deeper dive into the overall approach, see our guide on how to block light for deeper sleep, which covers the broader strategy of light management in your bedroom.
Curtain Selection: Product Categories and What to Look For
Now that you understand the system, let us talk about the actual panels. You should not just grab the first "blackout" product you see. There are distinct categories, and each has a purpose.
Category 1: Standard Blackout Panels (The Entry Point)
These are the most common. They are typically made of 100% polyester with a foam backing. Look for a product that explicitly states 100% blackout or 99.9% light blocking. If it says "room darkening" or "light filtering," it is not for you. That means it blocks maybe 85-95% of light, which is not enough for a shift worker.
The best panels in this category have a few specific features:
- Thermal insulation: This is a bonus, as it helps regulate room temperature, but it also makes the fabric thicker and heavier, which helps it hang flat.
- Grommet or rod pocket: Grommets are easier to slide, but they leave a gap at the top. Rod pockets are better for sealing. If you use grommets, you must have a valance.
- Weighted bottom hem: This is critical. A weighted hem keeps the curtain hanging straight and prevents it from billowing, which reduces side gaps.
I have tested panels from several brands, and the ones that consistently perform best are those with a triple-weave construction rather than a simple coating. The coating can peel, but the weave is permanent.
Category 2: Curtains with Built-in Side Seals
Some manufacturers have started adding magnetic strips or Velcro tabs to the edges of their curtains. These are a huge time-saver because you do not have to buy separate magnetic tape. However, they only work if you have a metal surface to attach to, or if the manufacturer provides adhesive wall plates. Check the reviews carefully - if people complain about the magnets being weak, it is a dealbreaker.
Category 3: Blackout Liners (The DIY Solution)
If you already have curtains you love, you do not need to replace them. You can buy a blackout liner that hangs behind your existing curtain. These liners are usually made of a heavy, opaque fabric and attach to the same rod. This is a great budget option, but it is less effective than a dedicated blackout curtain because you still have the gap between the liner and the wall.
If you go this route, make sure the liner is larger than the window by at least 6 inches on each side. You want it to overlap the wall, not just cover the glass.
Category 4: The High-End System Curtains
There are premium brands that sell complete systems - a track, a valance, and a curtain panel designed to work together. These are expensive, but they are the closest you will get to a commercial-grade solution. They often use a "light-lock" track with a groove that the curtain slides into, eliminating all gaps.
If you have the budget, these are worth it. But you can achieve 95% of the same result with a good panel, a ceiling track, and magnetic side seals.
Fabric and Color: What Actually Blocks Light
Let me clear up a misconception. The color of the fabric matters more than the thread count. A black or dark navy curtain will block more light than a white one, even if the white one is thicker. This is because the dye molecules absorb light energy. The back of the curtain - the side facing the window - should ideally be a dark color or have a black backing.
Most high-quality blackout curtains have a white or silver backing that reflects light back out the window. This is good for heat reduction, but it does not block light as well as a black backing. If you want the best of both worlds, look for a curtain with a silver backing and a dark face fabric.
Another factor is the weave density. Blackout fabric is not a single layer. It is either a coated fabric or a triple-weave. The triple-weave has three layers of fabric that are woven together, creating a dense barrier. The coated fabric has a layer of foam or acrylic applied to the back. The coated fabric is less breathable and can have a chemical smell when new. The triple-weave is more breathable and generally feels softer.
Here is a practical tip: when you receive a new blackout curtain, hang it up immediately and check for light leaks before you wash it. Washing can shrink the fabric or degrade the coating. Most blackout curtains should be dry-cleaned or washed on a gentle cycle with cold water. If you wash them, you must re-check the fit, as they may shrink by 2-3%.
Installation for Shift Workers: Timing and Usage Tips
As a shift worker, your relationship with light is different from a day worker. You are not trying to block out the night; you are trying to block out the morning and afternoon. This means your blackout system needs to be effective during the brightest hours of the day, when the sun is directly hitting the window.
Here is the thing nobody tells you about being a shift worker and using blackout curtains: your body will still know it is daytime. The curtains block the light, but they do not block the heat, the noise, or the circadian rhythm cues from your neighbors. You need to pair your curtains with a complete sensory shutdown.
I have found that using a sleep mask in addition to the curtains is not a sign of failure. It is a smart redundancy. Even with a perfect system, you might have a partner who opens the door, or a pet that needs to go out. A mask covers your eyes during those brief interruptions. I recommend a contoured mask that does not press on your eyelids, with a nose bridge that blocks the light that comes in around the sides.
You also need to be disciplined about your pre-sleep routine. When you come home from a night shift, do not turn on bright lights in the bathroom. Use a dim red or orange light, if possible. This is because your eyes are adapted to darkness, and a sudden burst of bright light will suppress melatonin. I keep a small red LED flashlight by my door for this exact purpose.
For a broader strategy on setting up your bedroom for sleep, including temperature and noise, check out our article on how to set up a sleep-friendly bedroom. The principles overlap significantly with light management.
Maintenance and Long-Term Performance
Blackout curtains are not set-and-forget. They degrade over time, and they also collect dust. Dust on the surface of the fabric can reduce its light-blocking ability by reflecting light back into the room. This sounds counterintuitive - dust is dark, right? But a dusty surface scatters light, and scattering creates ambient glow.
You should vacuum your blackout curtains every month using a brush attachment. If you wash them, you need to be careful. The coating on coated blackout curtains will eventually crack if you fold them tightly and wash them repeatedly. I recommend avoiding washing unless absolutely necessary. If you must wash, use cold water, a gentle cycle, and hang them to dry. Do not put them in the dryer, as the heat will damage the coating.
Check the magnetic seals every six months. The adhesive on the wall plates can weaken, especially if you live in a humid climate. Reattach them with a stronger adhesive like a construction-grade double-sided tape.
Also, check the rod and brackets. Over time, the weight of a heavy blackout curtain can cause the brackets to loosen. A sagging bracket can create a new gap at the top. I had this happen to me - I woke up one day to a bright stripe of light above my head because the bracket had tilted forward. I now use heavy-duty brackets rated for at least 20 pounds, even for lightweight curtains.
The Financial Reality: What This Costs
Let me be honest about the cost. A single high-quality blackout curtain panel can range from $40 to $150. A ceiling track system will cost another $30 to $100. Magnetic side seals are $10 to $20 per package. A honeycomb shade can add $100 to $300 per window, depending on size and customizations.
If you are on a budget, you can start with the basics: a good panel, a standard rod, and some magnetic tape. This will cost around $60 to $80 per window. It will solve 80% of your light problem. Then, as you get more frustrated with the remaining 20%, you can upgrade to a ceiling track and side channels.
The point is that you do not need to buy everything at once. But you should not buy a cheap panel and expect it to work. The cheap ones are usually too thin and let light through the fabric itself. Spend at least $50 on a panel if you want it to be truly opaque.
I also want to address the question of "what is the best blackout option for bedrooms?" The answer depends on your need. For a child's room, a simple blackout panel with a rod pocket is fine. For an adult who is a light sleeper, you need the full system. For a shift worker, you need the full system plus a sleep mask and a disciplined light routine.
A Practical Comparison Table: When to Choose What
Here is a decision matrix to help you choose your setup based on your specific scenario. This is not exhaustive, but it covers the most common situations.
| Scenario | Recommended Setup | Budget Estimate | Expected Light Blockage |
|---|---|---|---|
| Casual user, wants darker room on weekends | Standard blackout panel (triple-weave), outside rod mount | $50 - $100 | 95% |
| Light sleeper, urban environment | Blackout panel + magnetic side seals + valance | $100 - $150 | 99% |
| Shift worker, daytime sleep | Honeycomb shade + blackout panel + ceiling track + magnetic seals | $200 - $400 | 99.9% |
| Nursery / baby room | Blackout roller shade, inside mount, cordless | $80 - $200 | 98% |
| Rental (cannot modify walls) | Tension rod + blackout curtain with grommets + clip-on side covers | $60 - $120 | 90% |
I want to emphasize the last row. If you are renting and cannot drill holes, your options are limited. Tension rods are your best bet. You can also use adhesive hooks to hold the curtain flush against the wall, but removing them might damage the paint. In this case, a sleep mask is not just a nice-to-have; it is essential.
Common Mistakes and How to Avoid Them
I have made every mistake in the book, so you do not have to. Let me walk you through the most common ones.
Mistake 1: Buying a curtain that is too narrow. I once bought a curtain that was exactly the width of the window. It looked perfect when open, but when closed, the edges barely overlapped the frame. Light poured in from the sides. The rule of thumb is that your curtain should be at least 1.5 to 2 times the width of the window. For a 36-inch window, you want a 54-inch wide panel. This allows for the fabric to gather in folds, which creates a more opaque barrier because the folds overlap each other.
Mistake 2: Forgetting the top. I have already mentioned this, but it is worth repeating. If you use a standard rod, you need to mount it high - at least 4 inches above the window frame - and use a valance. The valance should be attached to the rod, not just draped over it. If the valance is not tight, light will leak over the top.
Mistake 3: Ignoring the light from other sources. A blackout curtain is useless if you have a gap under the door or a light from a digital clock. I have a friend who invested in a full blackout system, then complained it did not work. I walked into his room and the first thing I saw was a bright blue LED from his cable box. He covered it with electrical tape, and his sleep improved dramatically. Do the audit before you spend money.
Mistake 4: Not testing the fabric. You cannot tell if a fabric is truly blackout by looking at it online. You need to hold it up to a bright light. If you can see the light through the fabric, it is not blackout. If you buy online, read the reviews for phrases like "you can see light through the seams" or "not as dark as I expected."
Mistake 5: Overlooking the track system. Many people buy a great curtain and then hang it on a flimsy wire cable. The wire cable sags in the middle, creating a dip that lets light in at the corners. Use a rigid track or a sturdy rod with a center support bracket.
When I first tried to set up my own bedroom for daytime sleep, I made the mistake of buying a coated blackout curtain and hanging it on a tension rod. It worked for about a week, then the coating cracked in the folds and the tension rod slipped, leaving a gap. I spent another $50 on magnetic tape and a new rod, and it still was not perfect. It took me three attempts and about $200 to finally get it right. My advice is to learn from my mistakes and invest in the system from the start.
Conclusion: Your Action Plan for Better Sleep
Here is the bottom line. You do not need to live in a cave. You need to build a system that works for your specific light sensitivity and schedule. Start with the audit. Find your light leaks. Then, make a plan.
If you are on a budget, buy a good triple-weave blackout panel, a sturdy rod, and some magnetic tape. Install it correctly, and you will get 95% of the way there. If you are a shift worker or an extreme light sleeper, add the ceiling track and a honeycomb shade. The extra cost is worth it when you consider the cost of lost productivity and the health implications of chronic sleep deprivation.
Remember, the goal is not just to block light. The goal is to tell your brain that it is nighttime, so it can release melatonin and let you sleep. That requires a comprehensive approach. You can start with the curtain, but you should not end there.
Finally, do not forget to track your progress. Use a sleep tracking app or a journal to note how long it takes you to fall asleep and how many times you wake up. You can use our sleep stages calculator to understand your sleep cycles better, and you can learn more about monitoring your patterns with our guide on how to track sleep patterns at home. The data will tell you if your blackout system is actually working or if you need to make adjustments.
Total darkness is achievable. It just takes a little engineering. You have the knowledge now. Go fix your window.