The Missing Piece in Most Bedroom Setup Advice
If you have tried every tip about blackout curtains, white noise machines, and decluttering - and you still wake up groggy - you are not alone. The standard advice works, but it only scratches the surface. A truly sleep-optimized bedroom goes beyond darkness and temperature. It targets your biology: the air you breathe, the color of light you see, the textures against your skin, and the timing of your exposure to daylight.
I have spent years testing these variables in my own bedroom and with clients. The biggest shift came when I stopped treating the bedroom as a dark cave and started treating it as a physiological environment. In this guide, I will walk you through the measurable tweaks that actually move the needle - with specific numbers, tools, and trade-offs that most articles ignore.
When I first tried adjusting my CO2 levels, I made the mistake of sealing the room completely for blackout. My sleep quality dropped for a week before I realized the air was stale. That experience taught me that sleep setup is a balancing act. Here is how to do it right.
Air Quality: The Overlooked Gatekeeper of Deep Sleep
You spend a third of your life in your bedroom, yet most people never think about the air they breathe while sleeping. The two biggest factors are carbon dioxide (CO2) and humidity. Both directly affect sleep architecture, and both are easy to fix once you know the numbers.
Why CO2 Levels Matter More Than You Think
When you sleep with the door and windows closed, your exhaled CO2 builds up. In a typical bedroom, levels can reach 2000-3000 ppm by morning. Studies from the US Department of Energy suggest that indoor CO2 above 1000 ppm can impair cognitive function, and research on sleep specifically shows that higher CO2 reduces slow-wave (deep) sleep and increases awakenings.
The fix is not complex: get fresh air in. The simplest approach is to crack a window an inch or two, even in winter. If street noise or allergies are a concern, use a mechanical ventilation system or a fan that draws outdoor air in. I recommend buying a small CO2 monitor - they cost around $50-100 - and placing it near your bed. Aim to keep CO2 below 900 ppm overnight.
One thing nobody tells you: a tightly sealed house with modern insulation can have worse CO2 than an older leaky one. I have seen clients with brand-new energy-efficient homes struggle with morning headaches until they added a vent. Test your own space before assuming your air is fine.
Humidity: The 40-60% Sweet Spot
Humidity affects your breathing and skin. Too dry (below 30%) irritates nasal passages and can trigger snoring. Too humid (above 60%) promotes dust mites and mold, which aggravate allergies and disrupt sleep. The ideal range is 40-60% relative humidity.
You can measure humidity with a cheap hygrometer, often combined with a thermometer. If your air is dry, a cool-mist humidifier works well. If it is damp, a dehumidifier or better ventilation is the answer. I prefer a humidifier with a built-in hygrometer that turns off automatically, so you do not overshoot.
Do not fall for the myth that plants purify the air enough to matter for sleep. Most houseplants have negligible effect on CO2 or VOCs. You need actual ventilation, not a potted snake plant.
Lighting: It Is Not Just About Darkness
Blackout curtains are essential, but they are only half the battle. The color temperature of light - whether it is warm or cool - sends powerful signals to your circadian rhythm. You need to control both the intensity and the spectrum of light in your bedroom, especially in the hour before bed and the moment you wake up.
Warm Light at Night, Cool Light in the Morning
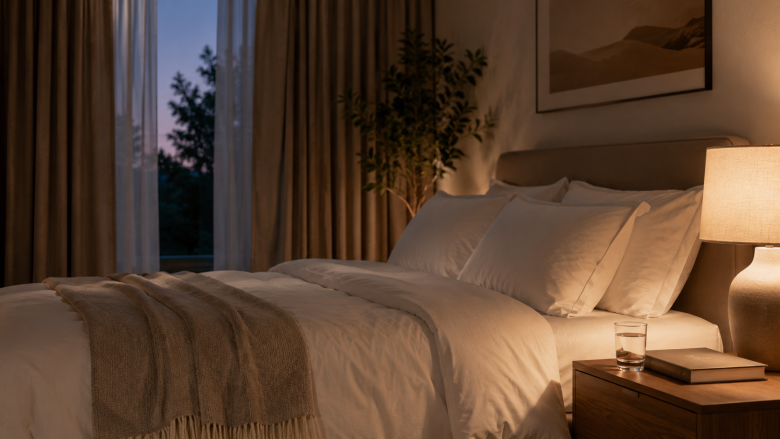
Your brain interprets light through specialized cells that are most sensitive to blue wavelengths (around 480 nm). Bright, blue-rich light in the evening suppresses melatonin and delays sleep onset. That is why you should dim your lights and switch to warm color temperatures (2700K or lower) at least one hour before bed.
I use smart bulbs (Philips Hue or similar) programmed to shift from bright white (5000K) during the day to a warm amber (2200K) after sunset. This is not a gimmick - it mimics the natural progression of daylight. If smart bulbs are out of your budget, use a dimmer switch and choose bulbs labeled "warm white" or "soft white" (2700K).
The thing many people miss: your phone and TV are not the only culprits. Even a small LED strip under your bed or a clock with a blue display can disrupt your melatonin. Cover or replace any electronics that emit blue light after dark.
In the morning, the opposite is needed. Bright, cool light helps anchor your circadian rhythm and makes it easier to wake up. If your bedroom is too dark in the morning - which can happen with heavy blackout curtains - you will feel groggy. Consider a sunrise alarm clock that gradually increases light intensity and color temperature, or open the curtains immediately after waking.
Practical Lighting Setup for Bedroom
- Use blackout curtains for total darkness at night, but make sure you can open them easily in the morning.
- Install dimmable bedside lamps with warm bulbs (2700K) for reading.
- Remove or cover any LED indicators from electronics, or put them in a drawer.
- Consider smart lighting with a schedule that automatically shifts to warm after sunset.
As we covered in our guide to setting up a sleep-friendly bedroom, the goal is to create a cave at night and a bright, airy space in the morning.
Sensory Textures: The Tactile Side of Sleep
Your skin is your largest organ, and what it touches all night affects your comfort and sleep quality. This goes beyond just choosing a mattress. The firmness, the breathability of your sheets, and the weight of your blanket all provide sensory feedback that can either soothe or irritate your nervous system.
Mattress Firmness: It Is Not One-Size-Fits-All
Most guides say "choose a mattress that supports your spine," but that is vague. The real question is: what is your sleep position and body weight? A side sleeper needs a softer mattress to relieve pressure on hips and shoulders. A back sleeper needs medium-firm to keep the spine aligned. A stomach sleeper needs firm to prevent the hips from sinking too much.
Heavier individuals (over 200 lbs) often need a firmer mattress to avoid bottoming out, while lighter individuals may find the same mattress too hard. If you share a bed, a mattress with adjustable firmness per side (like a split-firmness mattress or a topper) can solve disputes.
I have tested many mattresses, and the best advice I can give is to use the 30-second test: lie on your side, have someone check if your spine is straight. If your hips sink too much, you need firmer. If your shoulder digs in, you need softer. Most stores have a trial period - use it.
Breathable Fabrics: Cooling Sheets Are Not a Cure-All
Temperature regulation is critical for deep sleep. Your core temperature drops slightly as you fall asleep, and a bedroom that is too warm (above 72°F) disrupts this process. Breathable sheets help wick moisture and allow heat to escape. Cotton percale is crisp and cool, linen is even more breathable but has a rougher texture.
Bamboo viscose and Tencel are popular, but they are not always as cooling as marketed - some are just as warm as polyester. The key is the weave: a tight percale weave is cooler than a sateen because it has less contact with your skin. Look for sheets with a thread count between 200-400; higher counts are often denser and less breathable.
The trade-off: cooling sheets can feel too cold in winter. Layering is the answer - use a lightweight, breathable base sheet and add a duvet with a natural fill (down or wool) that you can adjust seasonally.
Weighted Blankets: Proprioceptive Feedback for Calm
Weighted blankets have gained popularity for good reason. The gentle pressure - typically 10% of your body weight - stimulates deep pressure touch, which activates the parasympathetic nervous system and reduces cortisol. Many people report falling asleep faster and feeling more secure.
However, they are not for everyone. If you are a hot sleeper, a heavy blanket can trap heat and make things worse. Look for a weighted blanket with a cooling outer layer or one made with glass beads (they are cooler than plastic beads). Also, if you have respiratory issues or are claustrophobic, skip it. Start with a lighter weight (5-8 lbs) and see how your body responds.
I have found that weighted blankets work best for people who crave deep pressure, like those with anxiety or restless legs. For others, a regular duvet with a high tog rating is enough.
Chronotype-Specific Setup: Align Your Bedroom with Your Internal Clock
Your chronotype - whether you are a morning lark or a night owl - dictates when your body naturally wants to sleep and wake. Most bedroom setup advice ignores this, but it makes a huge difference in how effective your environment is. The same room that helps a morning person wake up refreshed can harm an evening person's sleep.
Morning Types (Larks): Embrace the Light
If you naturally wake early, your bedroom should be positioned to let in bright morning light. Blackout curtains are still important for the night, but you need a way to expose yourself to sunlight as soon as you wake. A sunrise alarm clock or a timer that opens curtains automatically works well. You also want to avoid bright artificial light in the evening because your melatonin rises earlier.
For a lark, the ideal bedtime is around 9-10 PM. Set your smart lights to dim starting at 8 PM. Keep your bedroom cool (around 65-68°F) because your core temperature drops earlier.
Evening Types (Owls): Block the Morning
Night owls have a delayed circadian rhythm. They naturally fall asleep later and struggle with early mornings. If this sounds like you, the bedroom setup is the opposite in many ways. You need to block out morning light aggressively - not just for night sleep, but to avoid shifting your clock even earlier. Use heavy blackout curtains and a sleep mask. Consider an eye mask that blocks all light, because even a small crack in the curtains can signal your brain to stop melatonin.
In the evening, you need bright, cool light to push your bedtime later? Actually, no - you still want warm light at night. But you may need to expose yourself to bright light in the late afternoon or early evening (before sunset) to help shift your internal clock forward. This is called "phase delay" and it is tricky. A light therapy lamp at 10,000 lux for 30 minutes in the morning can help night owls adjust to a normal schedule, but the bedroom itself should be a dark sanctuary.
The Transition Zone: A Framework for Everyone
Instead of setting up the entire bedroom for one chronotype, create a transition zone - a period of 30-60 minutes before bed where you engage in calming activities in a dim, warm space. This can be a corner of the bedroom with a comfortable chair, a warm lamp, and maybe a book. Do not use this zone for work or screens. The goal is to signal to your body that the day is over.
I have built this into my own routine: I set my lights to warm at 9 PM, I switch to a dim lamp by my reading chair, and I avoid any bright screens. Within a week, my sleep onset time shifted by 20 minutes. It is not magic - it is consistent physiological signaling.
Common Mistakes and Trade-offs: What I Learned the Hard Way
No bedroom setup is perfect, and every tweak has a downside. Here are the mistakes I often see - and have made myself - so you can skip the trial-and-error.
Mistake 1: Over-Blackouting
Too much darkness can ruin your morning alertness. If you sleep in a completely pitch-black room and wake up to no light, your body does not get the cue to stop melatonin. That is why I now use a timer on my blackout curtains to open 30 minutes before my alarm. If you cannot automate, keep a small gap in the curtains or use a low-wattage warm LED on a timer.
Mistake 2: Relying on Air Purifiers for CO2
An air purifier with a HEPA filter is great for allergens, but it does not remove CO2. CO2 is a gas, not a particle. You need ventilation. I made this mistake and bought a $200 purifier before realizing my CO2 was still 2000 ppm. The only fix is bringing in outdoor air.
Mistake 3: Using a Weighted Blanket Every Night
Weighted blankets can become less effective with constant use, and they are not a substitute for good thermal regulation. I now use mine only on nights when I feel anxious or restless. On normal nights, a lighter duvet keeps me cooler and lets my body move more freely.
Trade-off: Fresh Air vs. Allergies
Opening a window is the best way to lower CO2, but if you have pollen allergies, it can worsen symptoms. A solution is to use a window screen with a fine mesh and run a small fan to push air in. Alternatively, install a heat recovery ventilator (HRV) or energy recovery ventilator (ERV) which brings in fresh air while filtering it. They are pricey but worth it if you have chronic nasal congestion.
Your Actionable Checklist: The Physiological Bedroom Setup
Here is a step-by-step checklist you can implement this week. It is not about buying everything at once - start with the highest-impact items and build from there.
- Measure your CO2: Get a portable CO2 monitor and place it near your bed. If it reads above 1000 ppm in the morning, improve ventilation.
- Adjust humidity: Use a hygrometer to check levels. Add a humidifier or dehumidifier to stay in the 40-60% range.
- Switch to warm bulbs: Replace any cool white LED bulbs in your bedroom with 2700K or lower. Install a dimmer switch.
- Create a morning light plan: Decide how you will get bright light within 30 minutes of waking - open curtains, go outside, or use a sunrise alarm.
- Choose breathable bedding: Swap synthetic sheets for cotton percale or linen. If you overheat, add a cooling pad or use a lighter blanket.
- Test a weighted blanket: Borrow or buy a 5-8 lb blanket and use it for three nights. If you wake up feeling more rested and not overheated, keep it. Otherwise, return it.
- Set a transition routine: For 30 minutes before bed, dim all lights to a warm setting and avoid screens. Use this time to read or meditate.
As you implement these changes, track your sleep quality using a sleep tracker or a simple journal. Our guide to tracking sleep patterns at home can help you interpret the data. You can also use our sleep stages calculator to estimate how much deep sleep you are getting based on your sleep duration.
The most important thing is to be patient. Your body takes about two weeks to adapt to a new environment. Do not change everything at once - tweak one variable at a time and see what sticks.
Good sleep is not a luxury; it is a biological requirement. Your bedroom is the stage where that requirement is met - or not. By focusing on physiology rather than aesthetics, you can turn your bedroom into the most powerful sleep tool you own.
I have seen clients transform their sleep by making just two of these changes: lowering CO2 and switching to warm lighting. The rest is refinement. Start there, and then build up to the full setup. Your body will thank you.